I recently got my hands on an older Raspberry Pi, which was a great excuse to see if I could get .NET running on it! If you're interested in playing around with a Pi or just want to see what it's like to get one running, then you're in the right place. I'll take you through setting it up, installing some programs and compiling some C# on the device with a few failures along the way.
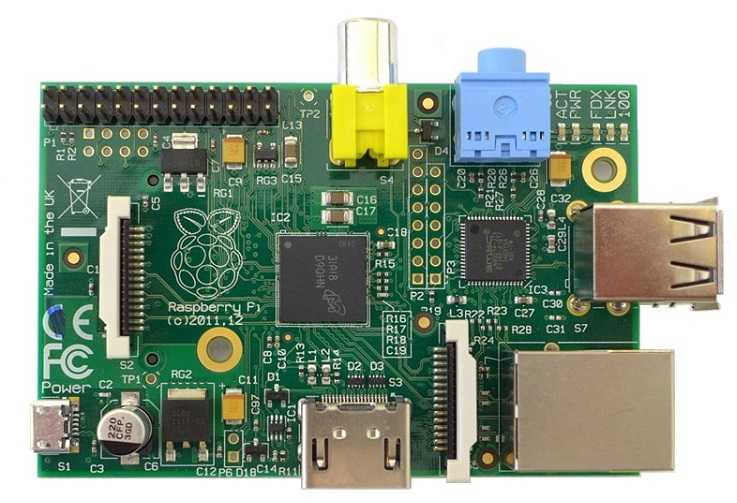
I knew this Raspberry Pi was an older model, but I wasn't entirely sure what model it was. Figuring that out seemed like a good first step because that might impact what OS I can run. Plus I wanted to make sure the model I had was able to run .NET. So my first challenge was to figure out what model I had.
At first glance, it looked like it would be a bit more difficult than I was expecting because there's no clear version number printed on the board and quite a few variations which are very similar. I found Wikipedia to be the best way to identify a Raspberry Pi. It lays out each model nicely and shows the mounting holes, components, ports and logo which you can use to determine your exact model.
From there I was able to determine that the model I had was the Model B (Gen 1). Now that I knew what I was dealing with, it was time to see if I could get it to boot. For that, I needed an SD card that would work, a USB Micro cable and a USB adapter. Luckily, I had more than enough phone chargers and a few old SD cards lying around.
My first few attempts at getting the Pi to boot were completely unsuccessful. To this day I don't know if it was because of the SD cards I tried or the Raspberry Ubuntu image I tried. But I may have run into almost every issue you can have (probably not, but it sure felt like it) and the quite extensive guide to troubleshooting boot issues didn't help either. However, somewhere along the way, I got my first image on screen!

Is that the Raspberry Pi rendering a nice rainbow square on screen? No, it's actually just rendering four pixels that have been scaled up to fit the screen. This happens when the GPU firmware successfully loads but then something later in the boot process goes wrong, such as an invalid image on the SD card. Although you'd be forgiven for mistaking it with the small rainbow square in the top right that indicates a low voltage from the power supply.
After trying a few different SD cards, I decided to ditch Ubuntu and try one of the officially supported images. I decided to try NOOBS first, which is an operating system installer that lets you pick from a few different operating systems including Raspbian (the official Raspberry Pi OS). This time I had a bit more luck, not much more, but more nonetheless. The Pi successfully booted! I pick Raspbian and wait for it to install.

And wait. And wait. I think it got to about 20% before refusing to progress any further. It may have just been really really slow, but I was starting to consider that maybe there's something wrong with the device. At this point, I'd been at it for a while, so I decided to leave it for another weekend.
One Month Later
I find myself looking at a Raspberry Pi Zero W, they're cheap and relatively easy to get. But not "already on my desk waiting for me" cheap. It's time to give this thing one last shot.
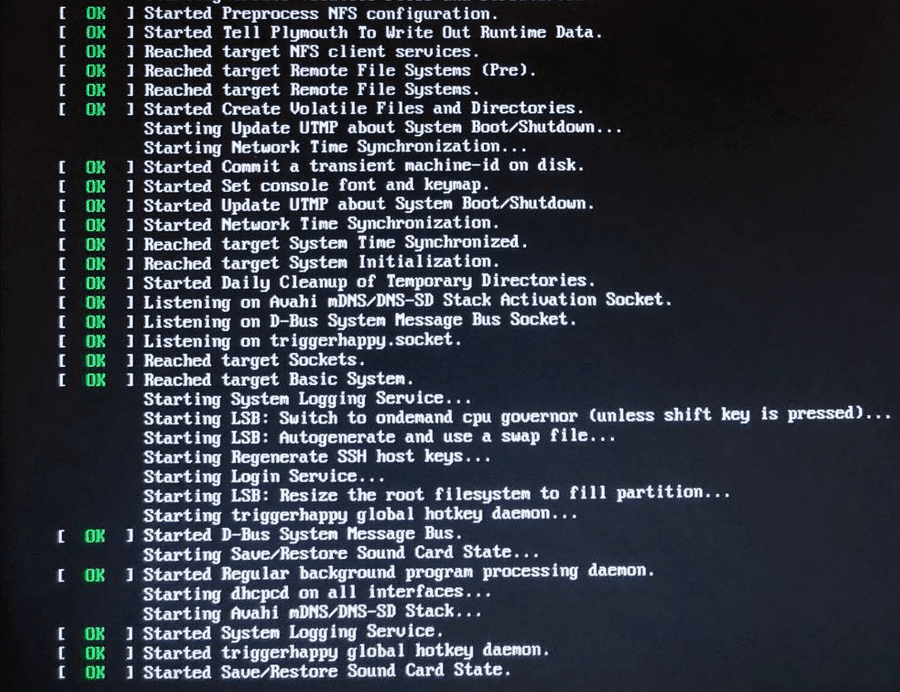
This time it's straight to Raspbian, in particular, Raspbian Lite (which doesn't contain a GUI). I skipped over the process of getting the OS onto the SD card earlier, but I wanted to point out how nice it is. Once you've downloaded the image file, which is just a zip, in this case, you use Etcher to write the image to the card. It's a three-step process of selecting the image, choosing the drive and clicking start, it's fast and flawless. I plug in the mouse, keyboard and monitor, insert the SD card, and plug in the power. And it Boots!
If you're wondering why that picture is so much clearer than the others, it's because I've switched from using a TV to a computer monitor. I didn't time how long it took, but I'd take a guess the Pi took around a minute or so to boot. After which I was prompted to log in.
Raspbian GNU/Linux 9 raspberrypi tty1
raspberrypi login:
There's already a default user. A quick search for the default credentials reveals Pi's secrets (u: pi p: raspberry). And I'm in!
The first thing I noticed was that the keyboard layout was different. Typing the pipe symbol | instead inserted a hash # which indicated a UK keyboard layout. Most settings for the Raspberry Pi can be updated by entering the command sudo raspi-config. You can also change your password and enable SSH from there.
The steps to change the keyboard layout are fairly straightforward. Well, except for selecting a non-UK keyboard because those are all grouped under Other. Here's the complete set of steps in case you were wondering.
- Select Internationalization menu
- Select keyboard setup menu.
- Select your keyboard (or pick one of the generic models)
- Select [Other]
- Select [English (US)]
Now I had a fully functioning Pi. So it was time to see if I could install some variant of .NET on it, either .NET Core or mono. What you can run depends on the CPU of the Pi you have. But there are two main versions, arm v6 and arm v7. All the specifications are on the same Wikipedia page I mentioned earlier but if your Pi is running you can also use the following command.
> uname -m
armv61
You might have noticed that the same moniker is printed in the welcome message after you log in. The Raspberry Pi I have contains an armv61 chip the same as the Pi Zero. This is a different model from the new chip in the Raspberry Pi 3 which contains an arm v7 chip. Unfortunately .NET Core (and a few other languages such as node) currently only support the newer arm v7 architecture. This limited my options a bit, but, it turns out that Mono does support arm v6. At this point, I can see the light at the end of the tunnel. I now have a method for running .NET on the Raspberry Pi.
I still wasn't sure if I'd be able to compile .NET on the device or just run applications, so it was time to get empirical. There are two Mono packages you can install via apt-get. The runtime mono-runtime and everything, mono-complete, which includes the compiler. I thought I'd take a stab at installing mono-complete.
The apt-get update command is for updating the local package cache, so I'll get the latest version of the Mono package.
sudo apt-get update
sudo apt-get install mono-complete
My luck's really coming about now. Mono installs successfully, first time!
Time to compile some code. I already had some C# I wanted to try out on the device, and I need my monitor back to get it. So it was time to switch to ssh so I can access the Pi remotely. I used chocolatey to install openssh.
choco install opensshPlugged the Pi into the network, and realised I had no idea what the IP address was. A friend of mine had pointed me towards arp earlier that day. A great little tool that lists all the IP addresses of devices on your local network. And while I quickly realised it is much nicer on unix-like systems, because it displays hostnames whereas I had to revert to manually looking them up (via nslookup), it was still very useful.
> arp -a

Interface: 10.1.1.227 --- 0x13
  Internet Address      Physical Address      Type
  10.1.1.1              aa-bb-cc-dd-ee-1f     dynamic
  10.1.1.29             aa-bb-cc-dd-ee-2f     dynamic
There weren't too many devices on my local network. I even chanced upon the correct Pi address on my first try.
> nslookup 10.1.1.29

Name:    raspberrypi.lan
Address:  10.1.1.29
Now that I knew the IP address, I could ssh into the Pi and do the rest remotely.
The file I had to copy was fairly small, and I could have copied the file over with scp but echoing out the contents into a file worked for me. Here's how to write hello world to a file.
echo 'using System;

namespace RaspberryPi
{
    public class Program
    {
        public static void Main(string[] args)
        {
            Console.WriteLine("Hello World");
        }
    }
}' > app.cs
Then it was just a case of compiling the program and running it.
> mcs app.cs
> mono app.exe
Hello World
So there we have it! Starting with an unidentified Raspberry Pi, some old SD cards and a phone charger. I managed to (eventually) successfully compile and run a .NET application.


